The structure of the new smart mapping menu differs from the old TB.One value mapping. It moves away from the three-column mapping table towards a, more intuitive graphical user interface:
The value mapping menu is now separated between the category selection and two columns, in which you will map properties and values in three easy steps.
![]() The channel categories are chosen first.
The channel categories are chosen first.
![]() The properties: All available channel properties available in this category are displayed. Assign your own properties.
The properties: All available channel properties available in this category are displayed. Assign your own properties.
![]() The property values: Here, you match your property values to the channel's values. Choose the appropriate channel values from the drop-down menus.
The property values: Here, you match your property values to the channel's values. Choose the appropriate channel values from the drop-down menus.
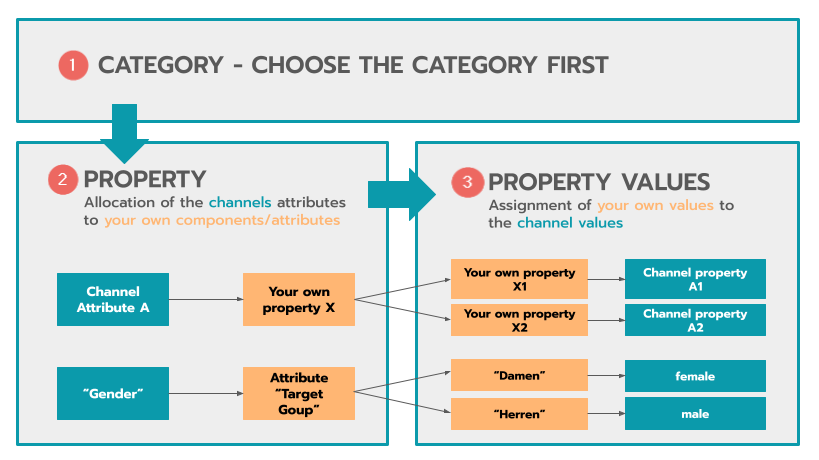
Fig. 1. The smart mapping process
How to smart map
Open "Channels > [Your channel] > Smart Mapping". Follow the instructions on the screen to map your values in three easy steps.
TIP: How "Map with AI" works •Smart Mapping will not suggest any properties for channel assignment. • •Complete the mapping of your product data to the channel's properties before you start the smart mapping via |
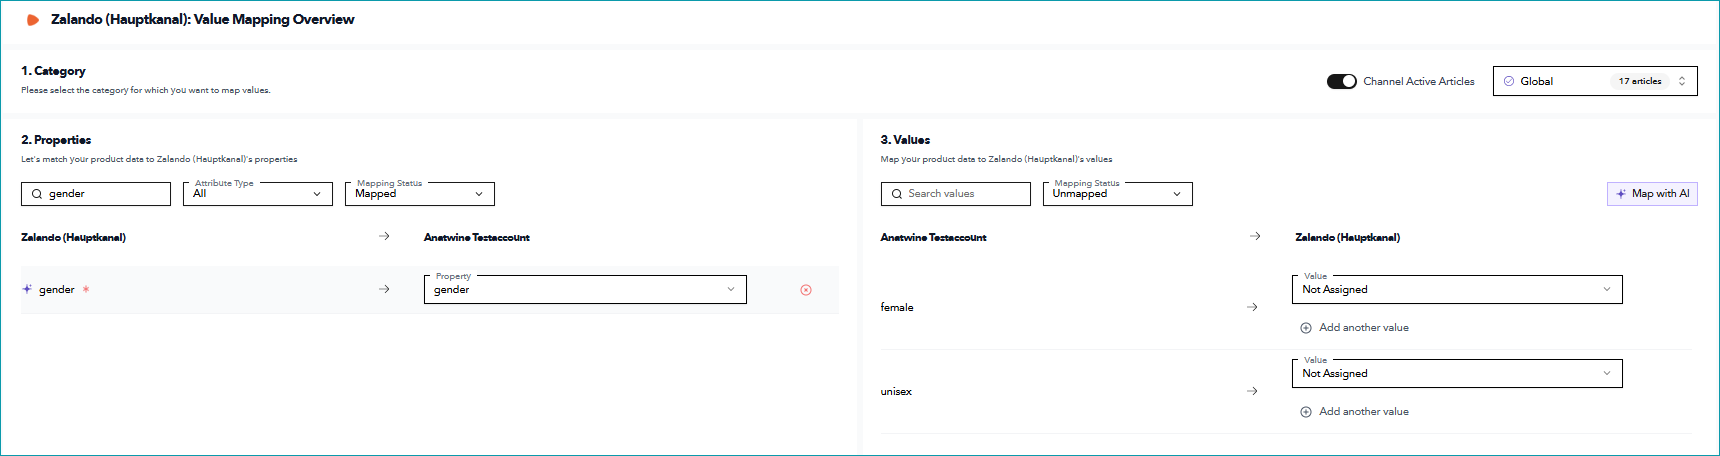
Fig.2: The Smart Mapping Screen
Step 1: Select a category or the global mapping
Select either the category or the global mapping.
You will then see the availability of channel properties and associated mappings.
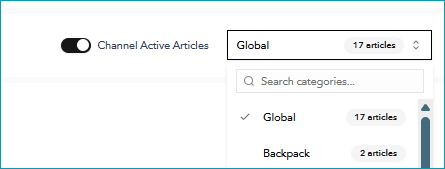
Fig.3: How to select global mapping or a specific category
TIP: Keep in mind: |
Step 2: Match your product data to channel properties
TIP: Use the filter section on top
|

Select a channel property:
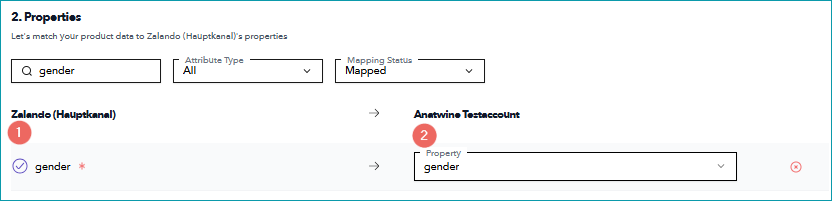
Fig.5: How to match your data to the channel's properties
Match the channel property to your product data. Smart mapping will automatically suggest properties where smart mapping is available:
![]() The channel's properties.
The channel's properties. ![]() indicates that
indicates that ![]() is available for this property's value.
is available for this property's value.
Tip: Map your properties manually first. Only then you can click on ![]() and it will take you to Step 3 to match your product data to channel values and to review the generated AI suggestions.
and it will take you to Step 3 to match your product data to channel values and to review the generated AI suggestions.
![]() Your attribute/component that is mapped to the channel property. Click on the "x" to delete the existing mapping of your product data to that specific channel property.
Your attribute/component that is mapped to the channel property. Click on the "x" to delete the existing mapping of your product data to that specific channel property.
Step 3: Matching your product data to channel values
You have selected a property. Continue with mapping your property values.
To use smart mapping, click on "Map with AI" ![]() . This may take some time until all suggestions have been generated. Refresh the page, if necessary.
. This may take some time until all suggestions have been generated. Refresh the page, if necessary.
TIP: Map with AI •The "Map with AI" button will be grayed out, if you have selected a channel property where the feature is not enabled. Selected properties are highlighted in light grey. •Mappings marked with |
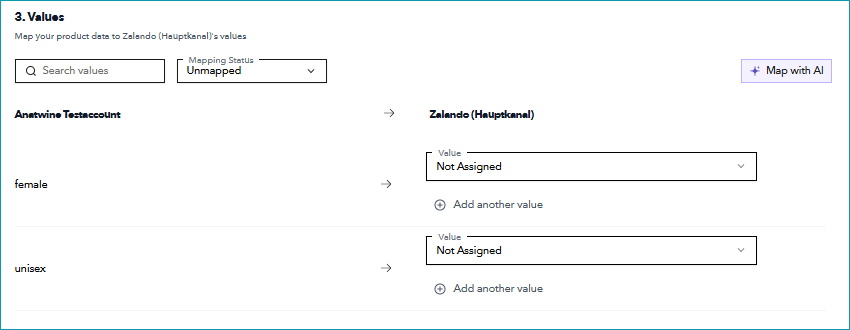
Fig.6: Map your values with AI
Step 4: Accept/decline suggestions and save settings
You can now start to review your suggestions and make changes to the suggested assignments. Delete an assignment by clicking the red X-Button.
Alternatively, reject or decline the suggestions made by AI:
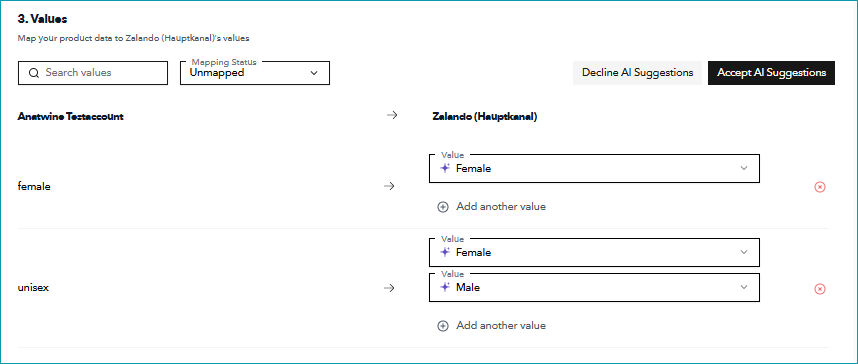
Fig.7: Accept/Decline AI suggestions
You have now finished reviewing and accepting your suggestions.