TB.One > Setup, Configuration & User Accounts > User Accounts > Creating Users and Assigning Roles
Creating Users and Assigning Roles
To create user accounts and assign roles, go to "Admin > User > Users".
Select the tab "Pages" in the left navigation bar and click on "New Employee" to open the editing window (see Fig.1).
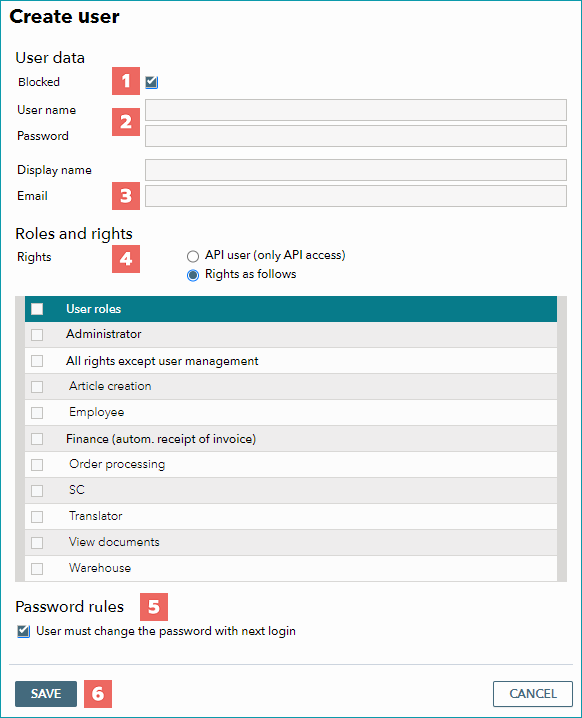
Fig.1: Creating a new user account
Number |
Description |
|
|---|---|---|
|
Enter the user's email address. This is the email address the user will use to sign in. Each email address can only be used for one user account. |
|
|
When you create a new user, TB.One sends them an email that prompts them to set up a password.
|
|
|
Choose a display name. This is the user name that is shown in TB.One. |
|
|
Select roles for the account from the "User roles" list. These roles determine which parts of TB.One the user can access. You can assign multiple roles to one user account.
|
|
|
Click "Save". |


ATTENTION: •Use the administrator role sparingly and carefully consider who needs such extensive rights. •One user can have multiple roles and roles can be reassigned at any point in time. |
TIP: |
For further information, see also:
•Overview: creating and configuring user accounts