During the value mapping, some channels do not offer lists of values that refer to sizes explicitly. Instead, they require a preliminary mapping step where you need to define a size grid that contains different size ranges for your products. The exact size values are only defined afterward.
Size grids make it easier to get a grasp on the value mapping process when the channel offers many different types of sizes. They group several size values into one coherent set, such as "Textile, Men, US double sizes [XXS/XS-5XL/6XL]".
In most product lines, size values (e.g. "8", "M", etc.) are variant forming. We therefore assume that your master data already contain a (usually variant-forming) "size" component. For Channels that work with size grids you only need to provide one additional piece of information: a size grid of your own. For value mapping purposes, a channel's size grid contains multiple size ranges such as "Women, Textile, Tom Tailor [XXS-XXL]", "Textile, Men, US double sizes [XXS/XS-5XL/6XL]", or "Textile, Women, DE, Manufacture [30-60]". Without a size grid of your own, you would have to assign a single size value to a certain range, e.g. the size "L" to "Women, Textile, Tom Tailor [XXS-XXL]". In that case you wouldn't be able to use "L" for any other size range.
The process of preparing your TB.One for a channel that uses size grids is explained in detail below.
CREATING A SIZE GRID
In order to assign your products to a size grid, you need to create it as a property in the basic data. As size grids are only used for mapping and are not intended to be published on a channel, you should use an attribute for your size grid. Attributes are created under "Basic data > Properties > Attributes". You can find a detailed guide on attributes here.
Create a new attribute and give it an intuitive name (e.g. "size grid"). Use the different size ranges from in your product line as the attribute values. Precision and meticulousness during this step will pay off during the value mapping, especially if you sell a wide range of products. Generally we recommend looking at the channels' size ranges for orientation. In the end, your size grid should contain all the size ranges you need for your assortment (e.g. for shoes, textiles, gloves, etc.). We also strongly recommend using size ranges that refer to specific target groups (e.g. children's shoes, women's shoes, etc.), the standard (e.g. US, UK, EU) and the spectrum of sizes in the size range (e.g. XS-XL).
COPYING A CHANNEL'S LIST OF VALUES
You can simplify the creation of your "size grid" attribute by copying and pasting the channel's size ranges into the values list of your attribute. This also makes the assignment process easier because the data sets will be identical
•In order to copy the channel's list of values, open the menu "Channels > [Your channel] > Value mapping". Click on the list icon (![]() ) to the right of a category (in the left column) to open the channel's list of values. A pop-up window will show the channel's properties including the respective values in alphabetical order.
) to the right of a category (in the left column) to open the channel's list of values. A pop-up window will show the channel's properties including the respective values in alphabetical order.
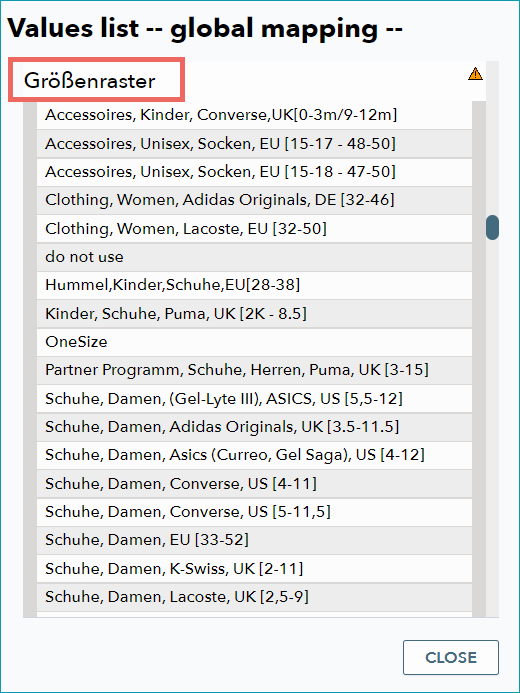
•Scroll to the property "Größenraster" (EN: size grid) or use your browsers search function to find it (CTRL+F). The exact naming of this property depends on the channel. Mark the values listed for the property (size ranges) with your mouse and copy them to the clipboard (CTRL + C).
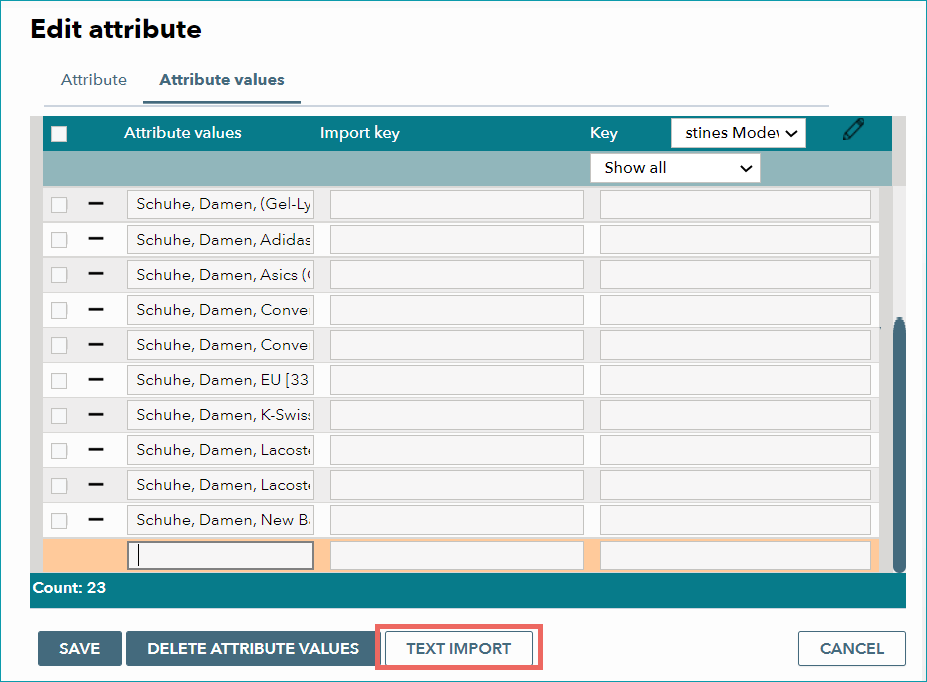
•In the next step, open the menu "Basic data > Properties > Attributes". If you have not created a "size grid" attribute yet, do so now. Click on the new attribute "size grid" (or similar). Open the tab "Attribute values" and click on the button "Text import" in the window's lower section.
•Paste the copied size ranges into the text import window (CTRL + V).
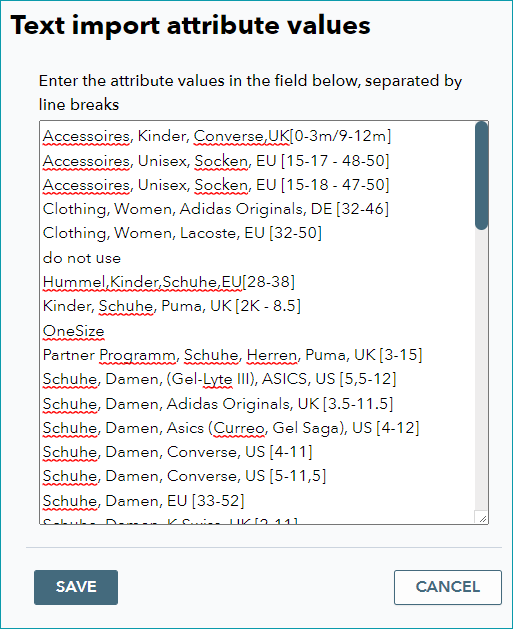
•Check the values list in the text import window. You can make changes here if you want to rearrange the list or delete some values. With a click on "Save" you add the values to you your "size grid" attribute.
ADD THE SIZE GRID TO PRODUCTS
Once you have created a "size grid" attribute, add it to all products that have sizes. Then chose the appropriate attribute value (size range) for each product. Please note that the attribute is only used to define the size range. You still need to provide the exact size values (e.g. "XL", "10", etc.) as variants (in case of products with multiple sizes) or as a product component (if the product only exists in one size).
TIP: |
TIP: |
TWO STEP VALUE MAPPING
Size grids are an exception in the value mapping process as their mapping requires two steps.
In the first step, assign your size grid to the channel's size grid. This is done in the same menu as most other value mapping tasks ("Channels > [Your channel] > Value mapping"). Depending on the channel (see your channel's "Channel overview" page) either choose "global mapping" in the left column or select individual categories for the mapping.
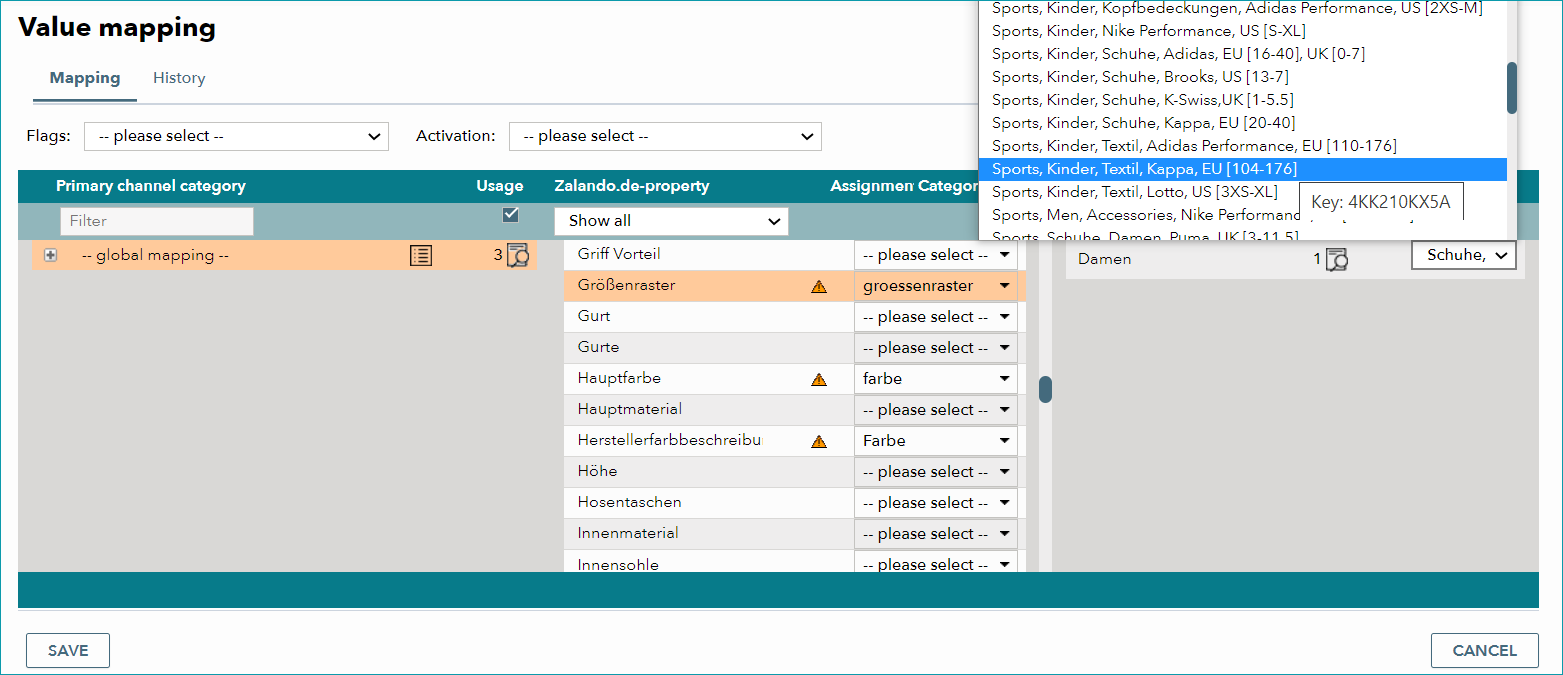
The middle column then shows the channel properties. Look for the property which contains the size ranges. Since the terminology depends on the channels, there is no consistent naming for the "size grid" property. However, you should still be able to recognize it. It is usually named "Size grid", "Größenraster" or something similar. Assign your own "Size grid" attribute (see above) to the corresponding channel property via the drop-down menu in the middle column.
Look at the right column. You can now see the attribute values from your size range there. Assign the corresponding channel size ranges with the drop-down menus.
In the second step, assign the exact size values to those of the channel.
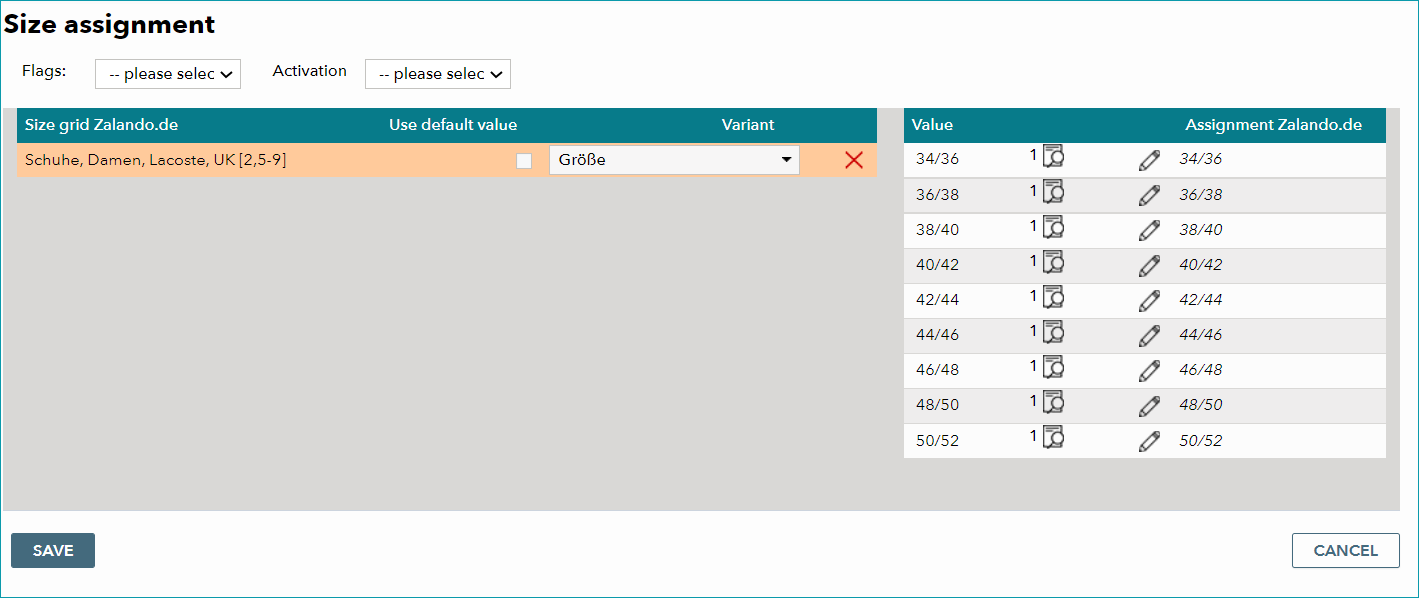
Once you have assigned the size grids in the value mapping menu (as described above), they are registered under "Channels > [Your channel] > Size assignment". First, assign your component "size" to the size ranges in the left column. The right column then shows the exact sizes you use in that component. TB.One will try to match your sizes to those of the channel automatically. If the proposed channel values (in the column "Assignment [your channel]") match your values, save the list by clicking on the "Save" button on the lower left. Otherwise, adjust the assignment by clicking on the ![]() icon. Repeat the assignment process for each size range.
icon. Repeat the assignment process for each size range.
For further information, see also: