TB.One > Prices > Prices and Price Lists > Adding Price Data to Price Lists
Adding Price Data to Price Lists
HOW TO IMPORT PRICE DATA AND PRICE LISTS?
As you know, you can import data into TB.One by uploading CSV or XML (TB.Cat) in TB.one's input menu ("Data exchange > Directories > Input"). The same is true for price list data.
TIP: You can also create price lists via import. Just provide the price data along with the price lists' import keys and the corresponding article numbers in a short import file. |
1. MASTER DATA IMPORT VIA CSV (ARTICLE, PANDA)
Use the default field names for price data. Don't use the channel sign as the import key. Instead, use the price list's import key. This way, you can import the price information directly into the respective price list.
TIP: |
For more information, see the page "Master data import via CSV".
2. MASTER DATA IMPORT VIA XML (TB.CAT 1.2/1.4)
TB.Cat 1.2: <A_PRICE>
Provide price data in the node <A_PRICE>, as usual. Use the price lists import key instead of the channel indicator for the XML-attribute "[channel]".It is also possible to use a shortened import file that only contains price data.
TB.Cat 1.4: <A_PRICELIST>
For TB.Cat 1.3 and 1.4, use the node <A_PRICELIST> instead of <A_PRICE> to configure price lists. This allows you to provide additional information such as the priority when creating a price list via TB.Cat.
For more information, see the page "Master data import via XML".
HOW TO MANAGE ARTICLE PRICES MANUALLY IN TB.ONE?
There are four different ways in which you can manually add price data to price lists:
1. CONFIGURING ARTICLE PRICES IN THE PRODUCT DETAIL VIEW
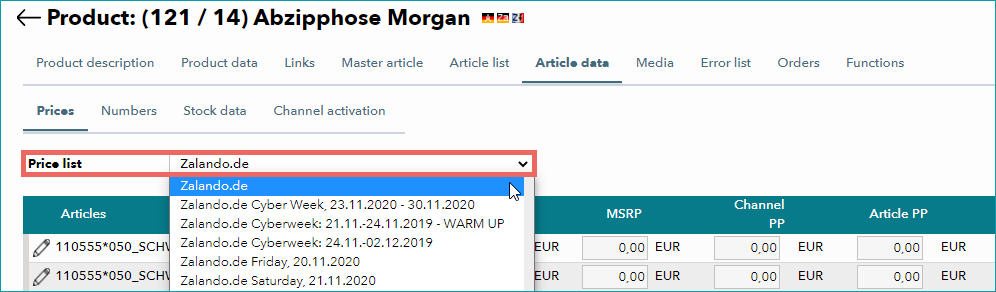
Access a product in the product list via "Articles > Product list" and click on the tab "Article data". Select a price list from the drop-down menu "Price list" and enter article prices in the corresponding columns. Once you are done, click the "Save" button, and the prices will be added to this price list.
2. CONFIGURING PRICE DATA IN THE ARTICLE DETAIL VIEW
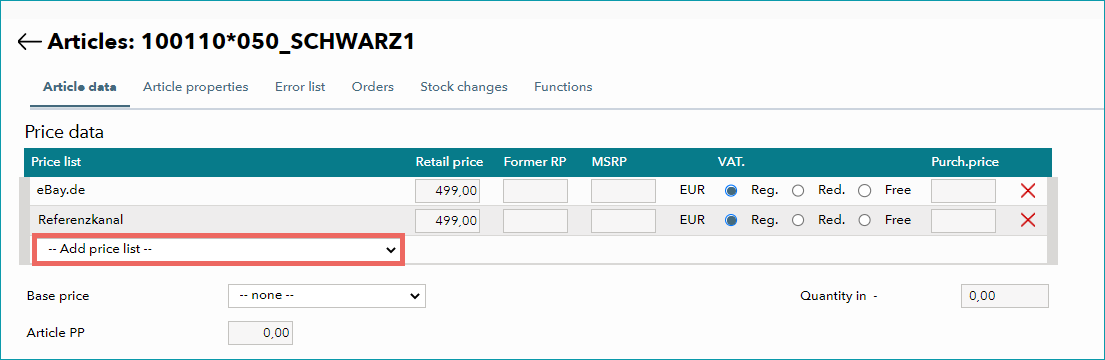
Access the article detail view via "Articles > Article list" by clicking on the article number. In the section "Price data", you will find an overview of the assigned price lists. You can add further price lists via the drop-down menu "Add price list". Select a price list from the drop-down and enter your prices. Don't forget to click the "Save" button before you leave the menu.
3. ADDING PRICE DATA VIA THE MASTER ARTICLE
If you want to assign prices and price lists to all of a product's articles, you can save some work by using the master article. You can find it in the product detail view, which is accessible via both the product and article list.
•"Articles > Product list", select the product
or
•"Articles > Article list", click on the name in the column "Designation"
Then, open the tab "Master article":
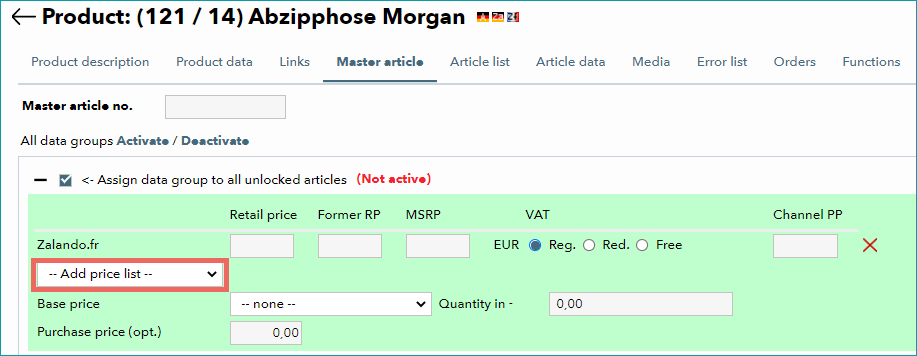
Activate the checkbox for the data group. Once it is active, the menu section is highlighted in green. Add price lists via the drop-down and enter prices in the corresponding free text fields. Make sure to save your entries before you leave the menu.
ATTENTION: |
4. CHANGING PRICES FOR SELECTED ARTICLES VIA BULK EDITING
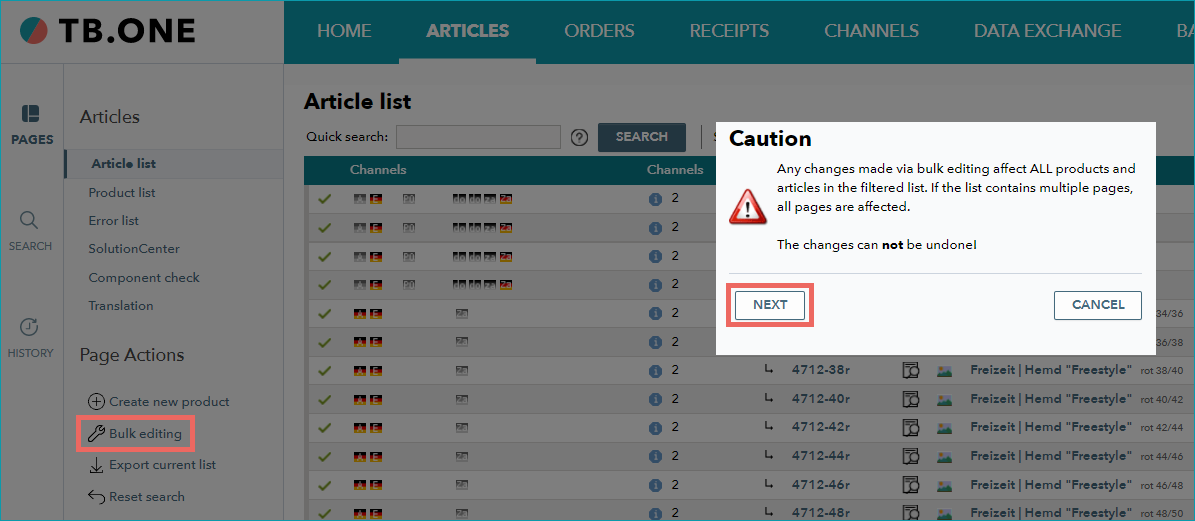
Access the article list ("Articles > Article list") and use the filter to only display the articles you want to change prices for. Then, click the menu item "Bulk editing" in the section "Page actions" on the tab "Pages" in the left sidebar. TB.One will show a pop-up warning message. Confirm that you have read the message by clicking on the "Next" button.
Continue in the pop-up window "Bulk editing". Scroll to the section "Price lists". As with the master article, activate the checkbox for the data group first, otherwise your changes will not be saved. Once the checkbox is active, the respective menu section is highlighted in green.
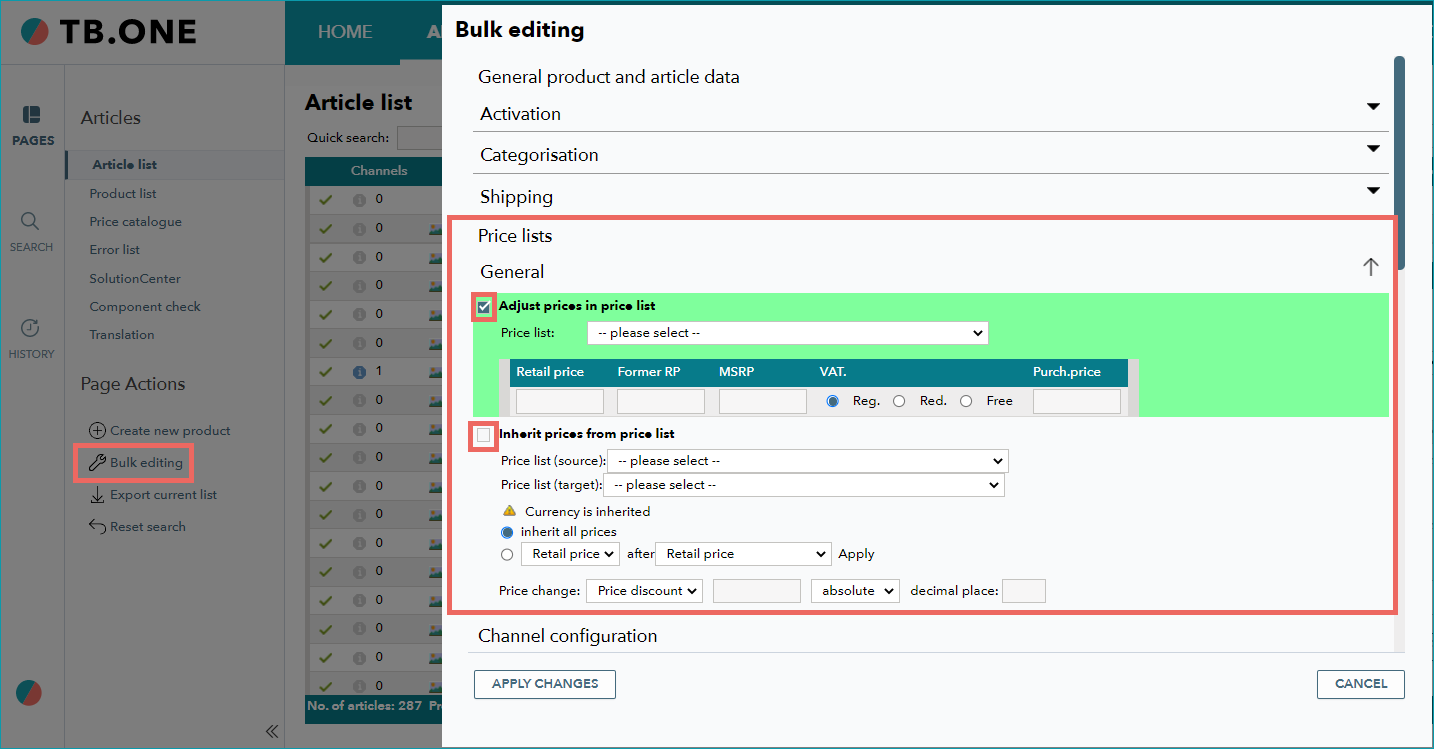
There are two menu sections relevant to price lists that you can activate via their checkboxes:
"Adjust prices in price list"
This section allows you to change prices for the filtered articles in the price list you have selected from the drop-down. Just enter the new prices in the free text fields for the three price types.
"Inherit prices from price list"
This section allows you to transfer prices for the filtered articles from one price list to another. The prices from "Price list (source)" will be copied to "Price list (target)".
If the target price list already contains prices for the filtered articles, they will be overwritten by the values from the source price list. Articles that were excluded by the filter are not affected.
The two radio buttons offer additional options:
▪Select the first button to "Inherit all prices", incl. Retail price, Former RP, and MSRP.
▪Select the second button to copy the prices from one price type to another (e.g. move the "RP" from your source price list to the field "Former RP" in the target price list) or to change prices by adding a surcharge or discount (specify whether you want to change the prices by a specific percentage or by an absolute value and define how many decimal places you want to calculate).
Once you have completed your settings, click on "Apply changes". Please be aware that these changes may have a large impact:
ATTENTION: |
For further information, see also:
•Price catalogue and price lists - overview